


Was hard to find this but is a cool video showing a lot of Tbilisi, Batumi, Mestia and Kakheti
Author Archives: admin
How to Install MariaDB on Centos 6

How to Install MariaDB on Centos 6
How to Install MariaDB on Centos 6
I decided to write this tutorial as many of the others on various sites seem to miss key parts of what should be a straightforward install. MariaDB is the latest version of mysql and uses as far as i can see the same code and commands as mysql.
I have just done this install on a fresh install of Centos 6 so here are the instructions –
1) First you need to add the repository. Edit a file called /etc/yum.repos.d/MariaDB.repo and add the following info –
[mariadb]

name = MariaDB

baseurl = http://yum.mariadb.org/10.1/centos6-amd64

gpgkey=https://yum.mariadb.org/RPM-GPG-KEY-MariaDB

gpgcheck=1
2) Additional bits that are needed –
yum -y install jemalloc nmap
3) Now to install the MariaDB server –
yum -y install MariaDB-server MariaDB-client
4) All other articles then say you should start the DB, but when I did that I hit some errors like these –
[root ~]# service mysql start

Starting MariaDB.180326 06:04:54 mysqld_safe Logging to '/var/lib/mysql/com.err'.

180326 06:04:54 mysqld_safe Starting mysqld daemon with databases from /var/lib/mysql

ERROR!

[root ~]#
So after looking at the error logs firstly it appears that the install does not create the data directory so you should do that –
mkdir /var/lib/mysql

chown mysql:mysql /var/lib/mysql
Then you also need to tell MariaDB to use that data directory so edit /etc/my.cnf.d/server.cnf and add the datadir line –
# this is only for the mysqld standalone daemon
[mysqld]

datadir=/var/lib/mysql
5) Now you have a data directory and a config file to point to it, you can now initialise your database –
mysql_install_db --user=mysql
If you are familiar with an old mysql install you will know that you can then run the secure install to remove demo dbs and set the root password by doing this –
/usr/bin/mysql_secure_installation
6) You can then check a restart of the database works ok –
service mysql restart
And set mysql to auto start after a server reboot –
chkconfig mysql on
That should do it mariadb is all ready to go !
How to perform addition on a set of values from a file in bash script

How to perform addition on a set of values from a file in bash script
How to perform addition on a set of values from a file in bash script
Every Unix Administrator has had this at some point… have written a script that extracts multiple rows with values in each column that you want to add up to get the total….
And every Unix Administrator will have written a 4-10 line loop script using pure bash or an awk script to add them up.
Well… here is a solution to do it all on 1 short line !!!
First off you need to have ‘bc’ installed on your server (it wasnt on my Centos 6 server), so install it like this –
yum install bc
bc is a basic calculator. So to test this you now need a file of data –
[root ~]# cat m2

1

12

5

36

100

[root ~]#
Simple enough file, so now the magic 1 liner to add it up…
[root ~]# cat m2 | paste -sd+ - | bc

154

[root ~]#
Want to see what its doing? Remove the ‘bc’ and you can see what the paste bit does –
[root ~]# cat m2 | paste -sd+ -

1+12+5+36+100

[root ~]#
So its taken all of your input and added + delimiter between each value, then piped the output to ‘bc’
Need it to handle decimal places? No problem create a file and add some decimal places in there –
[root ~]# cat m2

1

2.81

3

3.1

4

[root ~]#
[root ~]# cat m2 | paste -sd+ - | bc

13.91

[root ~]#
Obviously this was a very simple example, you can just as easily use grep and cut to get specific data and columns from a more complicated input file to achieve the same outcome
Hope this has helped you (or made you wonder how many times you had created some loop to add it all up manually with a large amount of additional code!)
Oh well, as a Unix Administrator there is always something new to learn, and something is only easy if you know how !!
The journey continues….
If you found this step-by-step tutorial useful then share it to your friends !
Sales and Invoicing System (SIS)
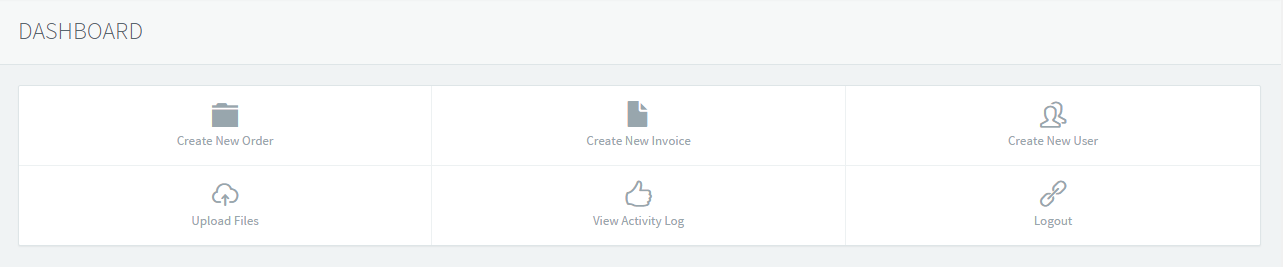
Sales and Invoice System – Dashboard
Sales and Invoicing System (SIS)
Client
Andiamo International Limited
Project Type
Custom solution for UK based client, providing a Sales Ordering and Invoicing System for a major shoe manufacturer and supplier to some of the biggest UK high street stores.
Project Involvement
Project Management, System Design, Project Planning, Infrastructure Planning and Implementation, Disaster Recovery Planning, and Systems Support
The SIS system has improved the way we work, we have a fully documented system (something we never had before), and in DSM and Bashworkz we have a reliable, skilled, and adaptable support, maintenance, and development solution that will take Andiamo forward for the next 10 years and beyond. –
Dawn Di Mambro (Owner of Andiamo Shoes / Walk London)
Description
Andiamo International is one of the larger suppliers for many of the leading UK High Street stores. With a range of their own brand products, they have had to maintain high quality of their products, as well as competitive pricing in order to maintain their position and relationships with stores including Debenhams, River Island, and many others.
They had been facing difficulties and various performance issues and bugs with their legacy Access based system for a number of years, which had got to a stage that was restricting their ability to provide the best service they could to maintain efficiency.
Andiamo Core Requirements
1) New system (including conversion of their legacy system) using modern infrastructure and coding techniques
2) Resolution to historical issues they faced on their legacy system
3) Reporting tools to provide better auditing and ability for them to manage their own system
4) Secure Backup and Disaster Recovery solution, protecting Andiamo data, and enabling fast recovery in the event of system failure
5) System Administration and Support
6) System Documentation for training and operational purposes
Project Implementation
Key elements of the Andiamo Sales and Invoicing System include –
– Dual Server infrastructure
– Bi-Directional Data Replication
– Development, Test, and Production environments, with full Change Control Management
– Infrastructure : CentOS 6.8, Apache 2.2.15, PHP 7.0.16, MySQL 5.6.35, Laravel 5.3.26
– Multi Company and Multi Element Invoice Generation solution
– PDF, XLS, CSV format Invoice production including built-in mailing functionality
– Built-in Auditing and Reporting
Sales and Invoice System Images

Sales and Invoice System – Invoices List

Sales and Invoice System – Invoices Edit
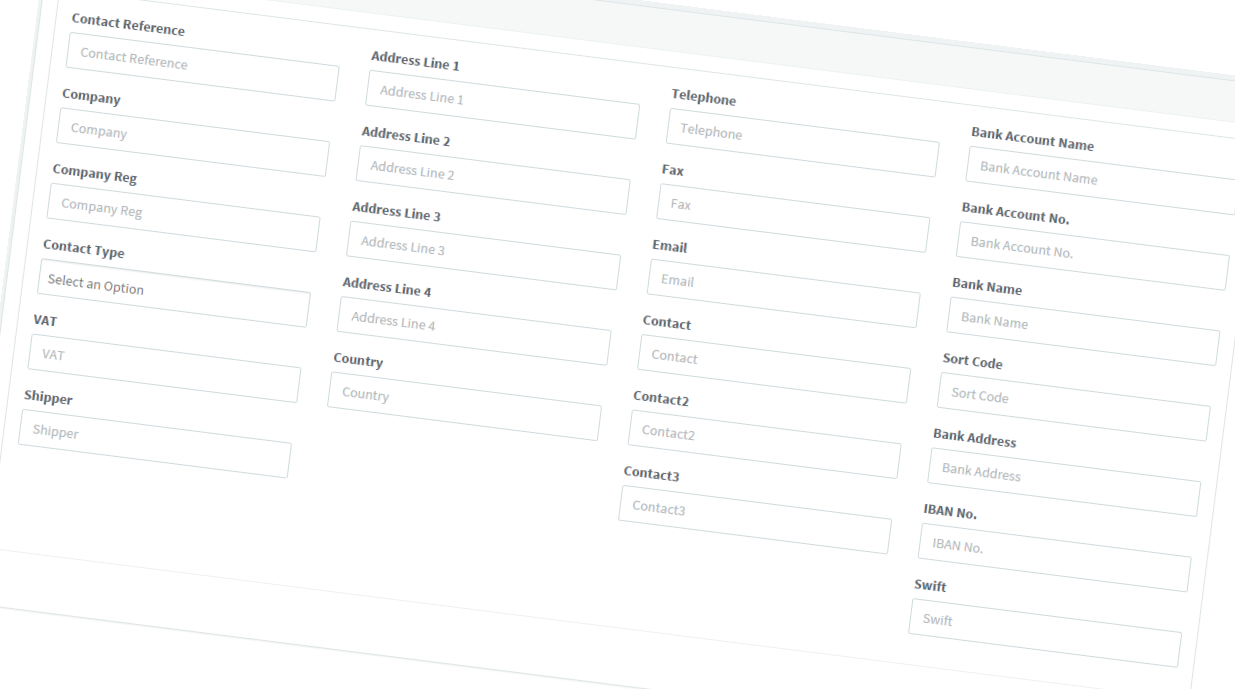
Sales and Invoice System – Add New Contact
Testimonial from Dawn Di Mambro (Owner of Andiamo Shoes LTD / Walk London)
As Owner of Andiamo Shoes / Walk London Shoes it is crucial that our in-house sales and invoice processing system gives us the ability to process orders in a quick and robust way, whilst allowing our team to produce accurate invoices so that we get paid!
We had been struggling with a very old system which had many bugs, frustrating performance problems, along with a lot of manual work, (including writing reports in Excel) in order to keep the company business processes functioning properly. It was so time consuming maintaining a crumbling system, instead of optimising our time in selling our products.
We approached Dynamic Social Media and Bashworkz to create us a brand new, bespoke system using modern software and infrastructure, to fix the issues and time consuming tasks we had, to give us peace of mind that our system and data was secure, and to support and develop the system as we face new challenges and opportunities in the future.
Not being particularly technical it was not going to be easy to write a spec for our requirements, but DSM and Bashworkz were extremely thorough and patient in working with us to understand business processes and even identified ways of optimising our processes, due to their knowledge of newer technologies. They were able to fully complete a Stage 1 system within 3 months. Over the following few weeks the finer clarification details and requirements had been implemented, and we were live. The ease of use of our new system is incredible and even for me, not being the most tech savvy I have been able to navigate it very easily and we now have built in customisable reporting!
Since then we have had various requirements and changes which have been coded and implemented very efficiently (normally within a few days), we have fully tested the system backup solution (as the Sales and Invoice System – SIS has been implemented in a dual server mirrored configuration for us), and we have started to add further improvements to the system to better suit the way we work.
Overall the SIS system has improved the way we work, we have a fully documented system (something we never had before), and in DSM and Bashworkz we have a reliable, skilled, and adaptable support, maintenance, and development solution that will take Andiamo forward for the next 10 years and beyond.
Nagios Systems Monitoring Application Review
Review of Nagios Systems Monitoring Application
Nagios System Monitoring application is one of the most popular tools used by Sysadmins around the world. Sure it has its issues, or things it hasnt been upgraded to do (like better notifications especially in a smartphone age), but it has proved to be a reliable application none the less.
I have used Nagios for various companies I have worked for for over 10 years now, and the main thing I have always had in my mind when implementing it is to ‘USE IT FOR WHAT IT IS INTENDED’.
This article attempts to detail how a Sysadmin should use Nagios, the environments it is most suited for, and how you can maximise its benefits.
Background
My role as a Sysadmin over the years has been mainly as an Integrator of systems. Having started out in IT 25 years ago from a mainframe background, I have seen how business practices and technology advances have evolved to better meet business needs. As IT technology and infrastructure improved we started to see large companies and corporations migrate their core systems from hugely expensive mainframes in order to get the performance they needed for their applications, to much more modestly priced servers, and then on into modular structure, with multiple servers, performing specific tasks, that together provide the business with the functionality it needs to achieve its goals.
This proliferation of physical quantity of servers had some consequences. Some people would say the major downside could be that multiple servers mean more ways for business functionality to have a problem (2 servers, twice the chance of an issue compared to 1 server… 10 servers, ten times the chances… etc). But any company director would tell you that company priorities and direction are an ever evolving set of things. Whether it is gaining more customers, improving the services it currently provides, looking to expand into new markets, or improving the efficiency of its workforce to meet the corporate challenges that we face.
Long gone are the days of buying a $1million beast of a server that performs all of these tasks, where it works out much more cost effective to buy multiple servers with the hardware and software characteristics best tuned to perform specific elements of a company infrastructure. Whether it is to enable better communication internally or externally with email or other messaging services, administering the company payroll and HR system, giving your company its external facing front end website, providing your marketing team with the reporting tools and statistics it needs, to not only analyse, but improve the way it works or identify new directions and opportunities. Each of these tasks (and many more as well) are distinct roles in the whole business vision, that even in isolation, provide a valuable service for any company.
Have a problem with 1 server now means you do not lose ALL of those elements ive described above, therefore lessening the business impact of any hardware or software problem.
Lets get back to the main topic of this article, but I think it is very important to get things in perspective from a company point of view as opposed to an IT point of view. Your IT infrastructure is only their to help your business achieve its goals.
Linux System Monitoring
One thing that hasnt changed too much in the last 20+ years, is the function of your system administrators and operations IT team. Whether your team is based in your datacentre, or spread around different offices in your country or even globally, they need to have the tools to spot potential issues, and to be able to react appropriately in order to resolve them in a timely manner. This where the multitude of system monitoring tools like Nagios come into play.
Nagios is the most recognised and ‘matured’ product out there, it has 1000s of metrics for you to choose from to measure and alert on the key metrics within your infrastructure from memory usage, disk usage, snmp nodes, number of processes, server load etc etc etc.
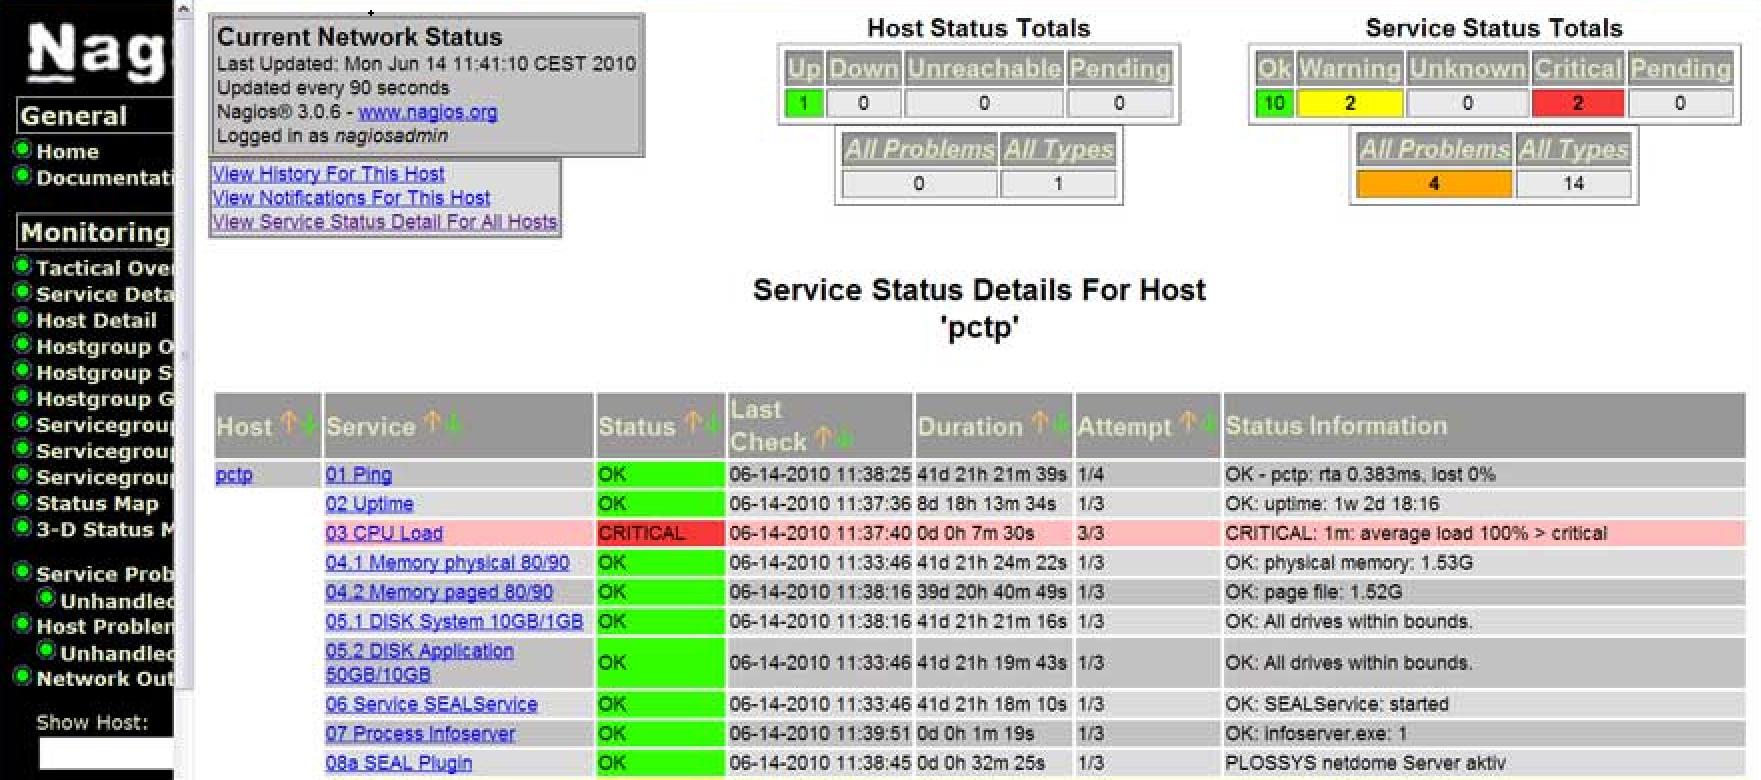
Nagios Host Monitoring – Nagios Systems Monitoring Review
Depending on the size of your server suite or organisation structure, Nagios allows you to group hosts or services into groups. I have worked for some large organisations, but can honestly say that I have never had the need or inclination to add that level of configuration and management of it in a live environment. An alert is an alert, and you want to know about it !
When I say ‘an alert is an alert and you want to know about it’, that is one of the main things for a system administrator to consider when implementing Nagios into their organisation. Nagios is an ALERTING tool, that means for every issue that you configure to alert you for, then there must be a solution that can be done in order to resolve it. This way of thinking is especially important in a multi-level support team. For example you have an operations team which is your 1st line support. Whether your work processes include 1st level support fixing issues or simply monitoring them, it is still important for them to have the detail of knowledge to know a) this is the problem, and b) this is how it will be fixed. Whether 1st line support actually performs the fix, or contacts someone else to do it, that knowledge builds a better understanding of an issues criticality, possibly what it impacts, and how it is resolved.
Every environment is different, and even different servers for different business purposes have different characteristics that help a system administrator to configure Nagios optimally. Getting an alert at 03.00 for a disk that has 10Gb space left available MAY be critical to an organisation which relies on large file uploads from a customer, however for a small internal mail server then its maybe not something that needs to wake you up.
Nagios has both a server side configuration (the nagios server), and a client side (the servers you are monitoring). Note that the Nagios server is ALSO important as a server to be monitored!! Problem on your Nagios server means potentially you are not monitoring all your other servers !
At the core of the Nagios server are your hosts and services definitions. These are 1) the hosts you are monitoring, 2) the services on each of those servers you need to check, and 3) how regularly you need to check each of those services. Once again these can be determined by a system administrator, BUT really they should be decided within your whole IT and Business Criticality team.
Problems mean downtime, downtime means loss of revenue, loss of revenue impacts company performance and goals.

Examples of possibly Bad Metrics- Nagios Systems Monitoring Review
Using the above as an example, is 485 processes unusual? Can you do anything to fix it? Does it highlight a real issue? Does the fact that your IPMI connectivity to the server is not working? What is its business impact? Does someone immediately need to update some operating software just because there is a new release of something? Should you be so irresponsible to even think of doing that without testing it first, or at least knowing what the update addresses/fixes ??!!!
If you really need to know about your disk with 10Gb space left, and you need to know about it immediately, then you set that specific check to happen every 1minute. If you need that check to happen on 50 servers, then sure you can do that as well, but then you will start to see as you add more and more services to be monitored more and more frequently, that you are building load on your Nagios server, as well as your network, and possibly each client server as well.
There is always a compromise, checking 5000 services every minute may be perfectly ok in your environment, but what happens if 20 of those services all has a problem at the same time? Then you need to have the manpower resource in order to fix those issues. Just think very carefully when configuring your alerts to raise only the ones which have potential business impact.
Variations of Alert Notifications
I want to include a small section here for those who do not like email notifications, or to be looking at your monitor all the time to spot issues as they occur. There are a number of Android (and probably IOS as well) applications to bring Nagios to your smartphone. I have tried a few, but the one I have always relied on is called aNag. You can download aNag here –
https://play.google.com/store/apps/details?id=info.degois.damien.android.aNag&hl=en_GB
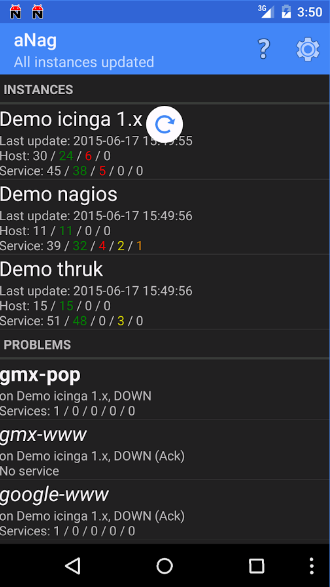
aNag Android Application – Monitoring from your smartphone – Nagios Systems Application Review
It has the functionality to alert, recheck and monitor all of your nagios instances and services. Maybe not the prettiest of apps, but lets be honest Nagios is not the prettiest of applications even in a web environment! But it does its job well if it is configured properly.
Summary for Best Practices using Nagios
I have waffled on enough (for now) about how I have used Nagios, and how it can be used optimally, so here is a quick summary –
1) Plan your Monitoring and Alerting.
What is important to you?
Why is it important?
Is there immediate remidial action that can be taken to resolve the issue?
How often does X need to be checked?
2) Think Business Impact.
If X fails, how does it affect my business?
Is issue X more critical than issue Y? Get your priorities right!
3) Monitoring something ‘because it can be monitored’ is not the way Nagios should be used.
Maybe there is a better tool to track your server load average?
Server Monitoring is not the same as Capacity Planning
4) Meeting SLA requirements
Once again Nagios CAN be, but also may not be, the best way to measure if you meet your SLA criteria.
5) Monitoring or Statistics
MONITORING !! There are 100 other tools to measure, graph, and project usage, issues, and other elements of your infrastructure
Download Nagios
You can download Nagios for free HERE
Best Android Apps – Game Review – Megapolis – Social Quantum
Best Android Apps – Game Review – Megapolis – Social Quantum
This Megapolis review is based on my time since early in 2016 when I first started playing this game. Megapolis is one of those City Builder type games that have been around for very many years now, but each one has its own features that makes it unique.
With frequent updates Megapolis has kept my interest going from what some people might call ‘tedious’ activities that you basically have to do each day.
ok so down to the main part of this review….
Graphics
Im not sure what spec Android platform is recommended to play Megapolis, but my Minix X8-H Plus works just great !! The graphics (once main parts of the game have been cached to your device) are bright, fast, and dynamic. There are no specific settings to improve or reduce the quality that ive seen, and to be honest it doesnt need any as it works just fine.
Some screenshots from around the game –

Android Best Apps – Game Reciew Megapolis – Megapolis City

Android Best Apps – Game Reciew Megapolis – Megapolis Military Base

Best Android Apps – Game Review Megapolis – Megapolis Space Port
Features
The aim (same as any city building game) is to become your own city manager, increase population, build factories, dig tunnels, manufacture goods and services, build your army, fly into space etc etc !
As I can make out from various forums Megapolis is a mature game that has many players from around the world, which says to me the devlopments and improvements the development team makes has kept users interested and playing along. I will talk a little more about multiplayer a bit later in the review, but for now will say that there is some limited multiplayer functionality within Megapolis.
Your quest is to build your own London or New York (or whatever city you come from), starting with basics like some small houses, a petrol station and a hairdressers, and then as you get more income you start building better factories making cars, buses, satellites etc etc as your empire grows. As your tiny village grows and grows and you earn more and more money you start to build skyscrapers, open a bus and rail network, install a cellphone network, mine for coal, open a steelworks the list really is endless !

Best Android Apps – Game Review Megapolis – Megapolis Oil Production
How free is free?
With any game like this it seems there are ALWAYS in-game purchases for real money. I actually dont begrudge that at all, the developers have created a good quality game therefore deserve to be paid for it (i remember the days when a game cost you $10-20 before you even played it!)
What I dont like about the in-game purchases within Megapolis is that your progress without them s VERY slow. the achievements you get when completing tasks is simply not enough to keep you interested long enough. I would say that the developers and marketers of Megapolis do need to look into this as at times it does feel a bit demanding for you to see progress and new angles to the game that you have to spend more and more money on it.
Saying that however if you are a patient person who likes to work hard to gain your achievements, then you can do it!
Multiplayer??
Megapolis does have some multiplayer functions in it like the Military Battles where you compete with other players in the game to earn the most points achieving a target which then can earn you rewards and freebies to buy more supplies etc to improve your city. I actually won one of these tournaments and got some credits to help me finish building part of my military base!
One thing that could really be improved is some communication channel where you can actually speak to other users in the game, whether its some messaging or newspaper functionality, or even an improved method of suggesting to other users your aims for your city and how other users can help you achieve it.
However out of any of the games ive played on my Minix TV Box, I dont think ive really found a game that was multiplayer enough for me.
Summary
To end this Android Game Review here is my summary of Megapolis.
Its fair to say that as I am still playing the game after nearly a year that it is addictive! If you are in a hurry to build an empire in a month then you will need to spend a fair amount of money with some in-game purchases, but if you are happy to progress at a slower pace (sometimes an annoyingly slow pace…) then you will have fun along the way, just dont expect to be top of the leaderboards in the first year !!
You can Download Megapolis for free from Google Play here – https://play.google.com/store/apps/details?id=com.socialquantum.acityint&hl=en_GB
RATING : 8/10
You can check out my other Android Game Reviews here, or read about my overall favourite applications for Android here
Flussonic Media Server Review
Flussonic Media Server Review
Having used Flussonic for well over a year now here is my review of it as a Media Server in a Business Critical or High Availability environment.
Introduction to Flussonic Media Server
I am a bit unsure of accurate details, but the following is my understanding of the history to Flussonic Media Server. Flussonic is a renamed product based largely on its earlier product name of Erlyvideo which from other projects I worked on, I became at least aware of its existance over 5 years ago. Erlyvideo seemed to be a russian product (at least a lot of its usage, forums and posts are by a mainly russian audience). I may be totally wrong but have a feeling Erlyvideo was a free product, so maybe the rebranding of it was to enable it to be sold to customers, but as I say I am not certain of that by any means so read with a large pinch of salt!
In this Flussonic media server review I will focus on what I consider key elements of any media streaming environment including features, stability, maintenance, implementation, as well as other things you should consider before using Flussonic.
Features of Flussonic Media Server
Firstly I feel it is important to highlight why anyone looking for a media server would want to take a look at Flussonic. Im going to cheat a bit here and paste some of the sales pitch from their website, and then make some personal comments after! Im only going to pick out some of the features of Flussonic I have seen in action, you can read the full (and extensive) list of features here http://flussonic.com/flussonic/features
Live streaming
Distribution using RTMP, RTSP, HLS, HDS, HTTP MPEG-TS and partially DASH
Up to 20 000 of simultaneous views from a single instance.
Authorization and registration of client sessions, even when using HLS-protocol
Distribution multibitrate multilingual stream with the possibility of switching the quality “on the fly”
Subtitles support
TV channels from satellite
IP cameras support
HDMI/SDI capture cards
Republishing between servers
H264, H265, MPEG-2 support
Server side playlists
Shoutcast radio support
Failover sources for a stream
H264, H265, MPEG-2 Video, MPEG-2 Audio, AAC, AC3, MP3, G711a/u
VOD streaming
Streaming from mp4 and flv files
All major platforms support – Android, iOS, Flash, STB, Smart TV
RTMP, HLS, HDS, DASH, RTSP delivery
Multibitrate and multilanguage mp4 streaming
Support for HTTP storages like http server, Amazon S3, Swift
SSD media caching
Load limiting system for disk drives
From a Live Streaming point of view I would say its biggest feature of the above is its core built in functionality to output in quite a large variety of output formats (RTMP, RTSP, HLS, HDS, HTTP MPEG-TS and partially DASH). This makes it one of the most complete set of output formats of pretty much any media server I have seen previously.
From a VOD point of view the same applies as I said above that the range of output formats is one of the largest I have seen in any media server making it a real plus.
Operations Guide to Flussonic Media Server
One of Flussonics great strengths is not only its ability to output in a wide range of formats, but also its ability to read in data in a variety of different formats from a variety of different sources.
If you have an IP Camera that plays its output over an RTSP stream, or if you receive IPTV from your ISP through multicast udp streams, or you are migrating from Adobe Flash Media Server and getting your content through a video card and streaming it currently using Flash Media Live Encoder, or even if you have found someone elses open RTMP stream you want to pull to your server, then flussonic can read that data and stream it out in its array of formats.
DVR capabilities of flussonic are pretty straightforward to configure for each stream. You basically set the amount of days of DVR content you require for the channel and flussonic will store it in its proprietary format in the directory structure you configure in its config file. Flussonic will take care of tidying of old data periodically.
Flussonic Media Server Review – Viewer Monitoring by Server
Backup streams are a pretty cool feature on Flussonic Media Server. You have the ability to set multiple inputs to a stream, this enables you as an example to have a primary input from satellite input, a second input from a rtmp stream you found somewhere on the net, and a 3rd input which could be a backup stream with a test card which will be used when the other 2 inputs are not available.
Transcoding data (altering stream quality) to of your inputs to meet your output requirements can be done within flussonic with its built in transcoder. This can be quite a cpu intensive process if you are performing it on a large number of streams particularly on a lower capacity server, but keep reading and will cover how you can spread your load over multiple servers. Anyway yes transcoding from within flussonic is a nice feature, and can even be used to transcode multiple quality outputs from a single input stream. However this is not a new feature to flussonic, but it does still (after easily over a year) have some bugs which have not been resolved (keep reading for more of flussonics problems below)
As I said above it is possible to seperate parts of flussonic onto multiple servers to suit your network and server infrastructure. If you come from a Flash Media Server background then you will probably be aware of the Origin – Edge concept to seperate your input streams (origin server), and your end user access (edge server). Flussonic has this functionality including Edge server caching capabilities which not only reduce network traffic between your Edge and Origin servers, but speed up content access times for your end users who can read cached data instead of having to grab it from the Origin.
Flussonic Media Server – The Pros and Cons..
So far in this review Ive focussed on flussonics capabilities and features. It all sounds very positive I think, HOWEVER these next sections will bring you back down to earth with quite a bang….
First I will summarise the Pros –
1) Variety of ‘ingest’ methods for input streams
2) Large variety of output formats
3) Scalability and modular functionality make scaling flussonic for large or small environments a relatively simple process

Flussonic Media Server Review – Channel Monitoring
There are more pros which ive hinted at already, but now is time to highlight some of the bad parts of Flussonic Media Server….
1) Pricing…. always a primary consideration for any company. When a site is VERY KEEN to offer you a FREE TRIAL, but you have to contact them to find out a purchase price, you are instantly turned OFF even looking! I would 99.9% of the time agree with you and look around for something else.
2) Support and ability for you to resolve issues yourself. As I said at the start of this review Flussonic is a rebranded (or renamed) product based on the russian product Erlyvideo. This means that a) most of the documentation was written in Russian first, and then translated into English, b) searching related forums for solutions to any questions you may have will also involve a hefty amount of Google Translate to find you any answers.
3) Reliability is always a major concern with a streaming environment, and unfortunately Flussonic fails to deliver. Please read the next section of this review where I will highlight some of the biggest reliability issues I have seen since using Flussonic Media Server
Reliability – Achilles Heel of Flussonic
The modular approach to Flussonic is one of its best features, but also its greatest downfall.
In order to get the best results from your Flussonic installations requires you to perform a HUGE amount of monitoring. That in itself is not neccesarily a bad thing, and as a Systems Administrator I would always advise strongly that monitoring of your services is core to ensuring high availability. What lets Flussonic down is a lack of a central monitoring methodology when you have built any multi-server flussonic environment. The Flussonic API is a start to help you program your own monitoring system, but (as is often the case) if the API or server has some problems, then your monitoring could potentially fall apart along with Flussonic as well.
Change Control seems very flakey within Flussonics technical support and development teams. With every new release (normally monthly approximately) they have a Google Group (https://groups.google.com/forum/#!forum/flussonic) where they publish the bug fixes and developments in each release. On the face of it that all looks pretty cool, however what they almost NEVER seem to do is any thorough TESTING of their code to test their solutions actually resolve the issues it is intended to fix, AND MORE IMPORTANTLY, from a non-disturbance point of view, to make sure previously working elements of Flussonic are still working !!
What that last paragraph should therefore confirm to you is that YOU should be very prepared to perform YOUR OWN TESTING PLAN once you upgrade or change ANYTHING within Flussonic Media Server. As I previously worked in a UK government systems administration role this was always a standard procedure, but in smaller companies like the one I work for here in Georgia attention to detail, change control, and implementation management is largely overlooked, which has caused us multiple instances where upgrades to Flussonic have caused us many more problems than solutions.
Building your custom testing plan for Flussonic
As I have already said Flussonic Media Server has a large suite of options and possibilities for any media streaming environment. However that means that with every option you decide to use you should have a suitable and thorough testing plan prepared. I have written my own set of both monitoring and testing scripts which mean I can not only keep on top of implementing new developments to my Flussonic environment, but more importantly be notified of issues on my current production environment.
Key elements you should consider monitoring are –
– Each used output format stream (HLS, RTMP, HDS etc). Flussonic API has a variety of tools you can use to test your streams, but it is only monitoring from a SERVER point of view. What is more important, is monitoring and testing your streams from a CUSTOMER point of view ! Are your end users able to view your streams using whatever devices you have enabled? You can read other articles on Bashworkz for tools such as ffmpeg and AdobeHDS, or get in touch on the contact page if you need some help or advice to implement a customised monitoring system which works for you!
– Checking your stream has both a video and an audio output stream. Nothing is worse for a viewer when they tune into your stream and either get a picture with no sound, or get sound but there is no picture!
– Linked to the previous point, you should be monitoring that a) your audio stream is working AND that it has some VOLUME (there are some instances for example a snooker game where sound is almost silent for periods of time that you should cater for), and b) that the video stream is MOVING (once again keep in mind for example if you are watching a live feed from the International Space Station the pic might not change very much)

Flussonic Media Server Video and Audio Monitoring
– Im going to mention Video / Audio synchronisation although it is one of the most complex areas for pro-active monitoring to be performed. To add to the complication is any environment or stream which includes audio dubbing which can inherently be out of sync marginally. Its just something to be aware of, and you should put in place whatever (even manual) checks to ensure your streams are working as you expect.
– DVR functionality (if enabled) should always be checked following any upgrade of Flussonic. Whether you have it configured to work through a customer facing Edge server, if you have caching enabled, or if you have configured to view using a core Origin server, all variations should be checked for non disturbance. This sort of testing can also be automated using ffmpeg or AdobeHDS using elements of Flussonic API to view a previous timestamp of a stream with a timestamped url to your stream.
– Automated or manual checking of Flussonic log files is another element that should not be forgotten about in your testing plans. The logging within Flussonic Media Server is actually pretty good, so should be reviewed in either a script automated process, or at least manually following any changes or flussonic upgrades, as well as on a regular running day to day basis. Being familiar with the logs can be crucial in identifying ‘out of the ordinary’ issues, but be aware that on occasions Flussonic do change the formats or information shown within their logs between versions, once again highlighting the need for controlled testing prior to implementing a new release into a production environment.
Review of Flussonic Media Server Overall Summary
To summarise this Flussonic Media Server review I would say the following –
1) Big positive is Flussonic large variety of input and output methods and protocols
2) Impressive set of scalability options which makes it suitable for both large and small installations
3) However be prepared that stability can be very flakey especially in a multi server environment, therefore you should implement a thorough set of monitoring processes to ensure maximum availability
4) Upgrades should be treated with the same level of change control as any new system project implementation. It would be (in my opinion) a reckless decision to upgrade to the latest version, without performing a LOT of non disturbance testing yourself prior to implementation into your Production environment !!
Easy Chroot SFTP configuration on CentOS 6 Tutorial

Easy Chroot SFTP configuration on CentOS 6 – Guide / Tutorial
Easy Chroot SFTP configuration on CentOS 6
Chroot SFTP configuration on CentOS 6 – Guide / Tutorial.
One of the biggest concerns of any security conscious Unix Admins is how to secure SSH and SFTP access to a server.
Todays post will show you how to secure SSH to specific users, and limit other specified users to SFTP access only.
My easy Chroot SFTP configuration process will follow these steps –
1) Enable port 2222 for SSH access
2) Enable port 22 for SFTP only access
3) Configure sshd to route users of a specified group to only permit SFTP access
4) Configure your SFTP users home areas
5) Restart sshd to take effect!
So lets take each one in turn.
1) Enable port 2222 for SSH access
The easy one. sshd is your SSH daemon, its main config file is /etc/ssh/sshd_config
If you edit that and enable port 2222 like this –
near the top of the file you will already see Port 22 listed so simply add a second line for 2222 :
Port 22

Port 10222
2) Enable port 22 for SFTP only access
The logic for this should be relatively easy to follow. First you want to create a group for your SFTP users to be assigned to –
groupadd -g 1111 sftpusers
the 1111 can be any id number you want.
Now you want to assign your sftp users to your new group –
usermod -g sftpusers user1
Do the above for all required usernames. If for any reason you need the users primary group to be something else you can change the -g (primary group) to be -G (secondary group)
3) Configure sshd to route users of a specified group to only permit SFTP access
Now you need a section at the bottom in the /etc/ssh/sshd_config file you edited already above to push users from your group sftpusers to only have SFTP access –
Subsystem       sftp    internal-sftp -f LOCAL3 -l VERBOSE

Match LocalPort 22 Group sftpusers

        ChrootDirectory /home/%u

        AllowTCPForwarding no

        X11Forwarding no

        ForceCommand internal-sftp
So the above says anyone using the default port of 22 who is in group sftpusers you want to ForceCommand to use internal-sftp
You can also see the ChrootDirectory is set to /home/$u which means you want the username used to use their home directory under /home
4) Configure your SFTP users home areas
The trickiest part but its actually not so hard, and ive written a little bash script which will do what you need based on the group id you used to create your sftpusers group earlier.
Before we get to the quick script the logic behind what we are about to do… Your aim is to force the user into a specific home directory, and to have only access to files under that home directory
If (like me) your users use /home/xxxxx for their home directories then this is still perfectly possible. You simply want to make the HOME area owned by root only, and only directories under the home directory to be read or writable to the specific username.
So… my little script (with an explanation under what it is doing) –
grep 1111 /etc/passwd | cut -d":" -f1 | while read LINE ; do

  usermod -d /${LINE} -g sftpusers ${LINE}

  chown root:root /home/${LINE}

  chmod 755 /home/${LINE}

  chown -hR ${LINE}:sftpusers /home/${LINE}/*

done
Line 1 – Get a list of users which have a group id of 1111 (group you created earlier), extract the username (1st column before :), and then read each line.
Then for each line do –
Line 2 – Remember in sshd_config you set the ChrootDirectory to be /home/%u ?? now you are saying use that /home as a base and set in the passwd file that the user will use /
Line 3 – Now you are setting the owner of the full home directory to be root and group to root as well.
Line 4 – Then set full permissions to root on that home directory
Line 5 – And lastly set the owner of everything UNDER that home directory to be the username and group to sftpusers
5) Restart sshd to take effect!
Very important or it just wont work…
service sshd restart
Testing –
Set the password of one of your sftpusers to something you know, and just try it –
sftp user@servername
Log in and get a file!
Putting a file there is slightly more complex as the directory you are in is owned by root. therefore it is best to make another directory inside the users home directory with Write permissions to the user and group sftpusers
You now want to prove that your user is NOT able to connect using SSH…
ssh user@servername
You will get a login prompt but it will log you out as soon you as try to actually log in
It is also advisable to check you ARE able to log in as a non-sftp configured user! And you can also check that you are able to access SSH using port 2222 which you created earlier as well –
ssh -p 2222 user@servername
Thats it, if youve done everything above correctly you have now restricted access to your SFTP server. Was my Easy Chroot SFTP configuration useful to you? Subscribe to my website for more useful posts in the future! Check out my
other Bash Tips and Tutorials
Timelapse Video – Construction of Dreamland Oasis in Chakvi, Georgia – Multiple Webcams

Timelapse Video Dreamland Oasis – Construction of Dreamland Oasis in Chakvi, Georgia
Timelapse Video – Construction of Dreamland Oasis in Chakvi, Georgia
Timelapse Video Dreamland Oasis –
Bash script automated image capture from multiple public webcams using ffmpeg to generate a set of timelapse videos from the Dreamland Oasis construction site in Chakvi, Georgia.
The videos are an example of what can be achieved using ffmpeg to capture an image from a live stream, along with concatenating the 1000s of images together to make a timelapse video.
The images were extracted from the public webcams on dreamland.ge website since 2014 (there was 1 webcam originally and they added more as time went by), which were then merged into the 5 timelapse videos you can see below.
LIVE STREAMING / MEDIA PROCESSING PROJECTS
If you want your construction project streamed live on your website, timelapsed into a video like the above, or any other custom media work, then contact us –
Check the full set of timelapsed construction of Dreamland Georgia here –
webcam 1 –
webcam 2 –
webcam 3 –
webcam 4 –
webcam 5 –
FFMPEG is a command line based media tool for Linux. Read more about ffmpeg here
How to extract emails from a PST file using Bash on Centos
How to extract emails from a PST file

How to extract emails from a PST file using Bash on Centos
How to extract emails from a PST file using Bash on Centos
How to extract emails from a PST file using Bash on Centos – Todays post explains something I have been looking to do for some time now to extract the email data from a PST file. If you have ever used Microsoft Outlook then you might be familiar with the famous (or infamous) pst data files your emails get stored in.
Nowadays most people have migrated their email addresses to either Gmail, or other online platform for a variety of reasons, but probably one of the main reasons has been so you dont lose all your emails after you reinstall your OS, or have a problem with your disk. With an online service at least your emails are stored in the cloud!
The data in an email file is not the prettiest of things, but with some more bash scripting (i will keep this in mind for a future article) getting the useful data out can be very useful.
So for todays post we will just do the basics… extract your emails while keeping the folders intact on Centos.
After some searching around there is a package called libpst. It is not installed as default so to install it on Centos 6 using yum do this –
yum install libpst.x86_64
If you so a ‘yum search libpst‘ first you will find the package name for the 32 bit version if you need.
The install will automatically install a dependency libpst-libs for you.
After the install is complete you now have a very useful command readpst.
My advice is create a working directory where you want your emails to be put like this –
mkdir -p /tmp/work

cd /tmp/work
Put your pst file in /tmp/work just to keep things in the same place.
There are a number of options to the readpst command you can read up on the man page, but to keep things simple here is what I did –
readpst -S outlook.pst
# readpst -S outlook.pst
Opening PST file and indexes...
Processing Folder "Junk E-mail"
Processing Folder "Sent"
"Sent" - 7 items done, 0 items skipped.
Processing Folder "Inbox"
Processing Folder "Deleted Items"
Processing Folder "Outbox"
Processing Folder "Sent Items"
Processing Folder "Calendar"
Processing Folder "Contacts"
Processing Folder "Journal"
Processing Folder "Notes"
Processing Folder "Tasks"
Processing Folder "Drafts"
Processing Folder "RSS Feeds"
Processing Folder "Junk E-mail1"
"Personal Folders" - 15 items done, 0 items skipped.
"Tasks" - 0 items done, 1 items skipped.
"Sent Items" - 0 items done, 1 items skipped.
"Journal" - 0 items done, 1 items skipped.
"Calendar" - 1 items done, 5 items skipped.
"Junk E-mail1" - 2 items done, 0 items skipped.
"Inbox" - 3491 items done, 5 items skipped.
#
Display what you have just extracted with a ls and you will see something like this –
# ls

Outlinfo.pst  Personal Folders

# cd Personal\ Folders/

[Personal Folders]# ls

16  Calendar  Inbox  Journal  Junk E-mail1  Sent  Sent Items  Tasks

[Personal Folders]# cd Inbox/

[Inbox]# ls

10

100

1000

1000-cpanel-logo-tiny.png

1001

1001-cpanel-logo-tiny.png

1002

1002-cpanel-logo-tiny.png

.....
As you can see your whole folder structure is kept, and each email is given a number (along with any embedded images as well). You can then cat the file to see its contents. Be aware that the layout will be different depending if the email was a text or a HTML formatted email, which you can parse with bash after comparing the appropriate content type area of each file –
Content-Type: text/plain; charset="UTF-8"
or
Content-Type: text/html; charset="UTF-8"
As I say I will get around to writing a followup article with some more examples of how you can extract specific information from your emails, but basically grep, sed, and awk will be the major tools you need to get what you want out!
If you like this article then please subscribe to my blog, and be sure to check out more bash script tutorials from the menu at the top of the site.